Yesterday saw the monthly
Hail Caesar battle between the armies of Carthage and Rome.
Aaron was kind enough to host the game at his house on a large table set up in his living room which was very fun. Our armies have grown considerably over the last few months and this battle was our largest yet and the most interesting from a strategic point-of-view. The game had moments of panic, twists of fate and some ferocious fighting at the center. At the end of the day, Hannibal displayed great acumen and was able to organize his troops and lead them to a rousing victory.
Hannibal organized his battle lines with his most trusted veterans holding the center supported by the Libyan infantry. To his right flank was his brother Mago, commanding a unit of Spanish Scutarii, a war elephant and the Liby-Phoenician cavalry. Positioned on the left flank was the irritable Hasdrubal and his Numidian cavalry, a second war elephant and a single unit of Spanish. As the morning fog lifted, the Romans emerged - infantry at their center, archers and Numidians to the Carthaginians right and auxiliaries to the left. A single Scorpion was placed atop a hill ready to strike down those that got too near.
The lines on both sides stood and waited. The Roman-allied Numidians suddenly broke from their position and in a cloud of dust raced quickly across the front of the entire Roman line. A gap had been spotted in the Carthaginian left flank and the Romans were quick to exploit it with swift horses and the advance of their auxiliary units. This left flank would prove crucial to the outcome of the battle. Hasdrubal, seeing his error, ordered the Numidians to meet the Romans in a small canyon and to halt their advance. Meanwhile, those Numidians allied with the Romans raced past the skirmish and found themselves suddenly behind the Carthaginian lines, ready to cause havoc. The loyal Spanish lifted their shields and wheeled to meet the unexpected challenge, intent on holding the critical left flank.
On the right flank the Carthaginians were lethargic. Mago failed to rouse his troops to action and in fact, several terrible blunders occurred which resulted in his cavalry fleeing the battle and the mighty war elephant to unexpectedly leave its position and charge toward the enemy in a frenzy. The elephant and its crew were wounded, but the elephant was skillfully returned to the Carthaginian line without too much disruption. Meanwhile the Roman archers crept off to the shores of a small nearby lake hoping to inflict woulds on any advancing enemy while being protected by the marshes and reeds. The Romans on the right flank were unable to take advantage of the Carthaginian blunders due to very poor command rolls. Seeing the inaction of the Romans, Hannibal commanded Mago to abandon the right flank entirely and bring his troops toward the center and away from the lake.
Back on the volatile left flank the fighting was fierce. In the end the Romans auxiliaries and the Roman allied Numidian were either destroyed or sent to flight. Not only was the Carthaginian left flank now secure, but it was free of the enemy and open for a quick advance and flanking maneuver Hannibal, who had held his eager but disciplined veterans back while chaos was enveloping both flanks, finally ordered the advance at the center. The Ligurian slingers, normally so reliable and formidable on the field, were of little consequence as they were scattered by the artillery and advancing Romans - and so it would be heavy infantry clashing with heavy infantry to decide the outcome. Some strong shields and decisive moves by Hannibal saw one unit of veterans supported by the valiant Spanish punch a hole through the Roman lines. These units then circled back - the veterans moving to their left and the Spanish moving to their right and attacking the rear of the Romans who were already engage, trapping them and leading to the destruction of the Romans.
The game lasted about three hours and was extremely enjoyable. We are still plagued with a very, very high number of failed command rolls during our games which is leading to some frustration for both of us. It isn't that one side gains an advantage because of this as it is happening to both of us, but we would rather not have our armies standing around doing nothing, especially when their are strategic decisions that we cannot carry out in a timely manner and so miss the opportunities. We have decided for the next game to up all of our command values by one to see if that helps.
Below are some photos for the game, I hope you enjoy them.
 |
| The initial deployment. |
 |
| The eager Romans. |
 |
| The Carthaginian center. The teeth of the army. |
 |
| Numidians holding the left flank. |
 |
| The left flank is bloody. |
 |
| One last charge by the Romans sees them destroyed. |
 |
| The war elephant frenzies and charges the Romans alone. |
 |
| The left flank battle is drawn. |
 |
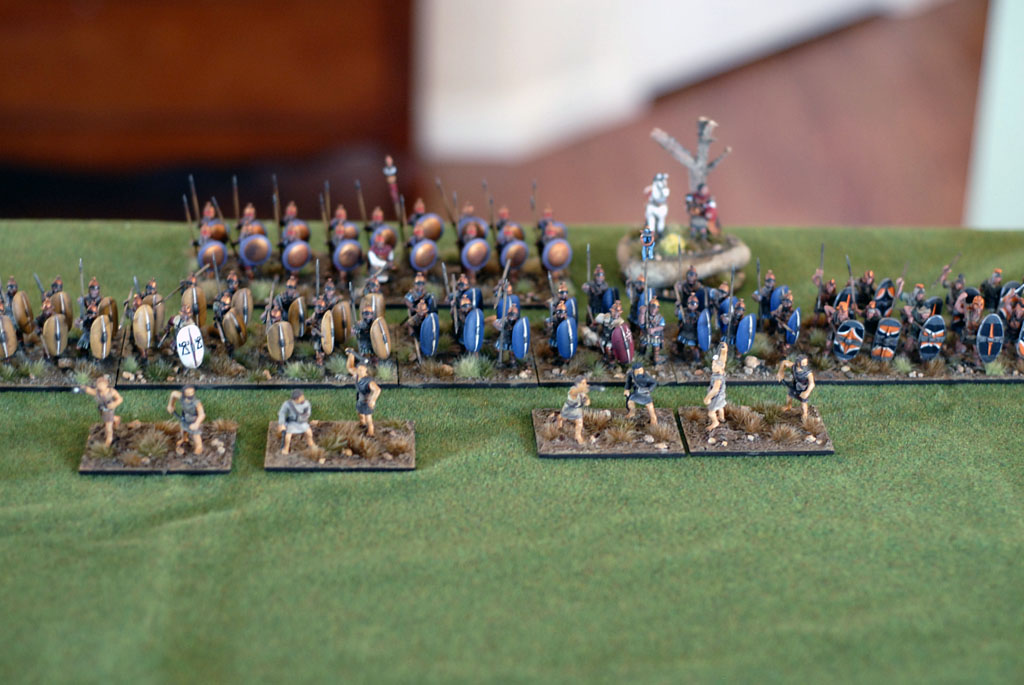
| The heroic Spanish that stopped the Roman advance. |
 |
| The center of the field. |
 |
| Carthaginian veterans push forward. |
 |
| Mago Barcid surveys the battle. |
 |
| Libyan heavy infantry move to support the battle lines. |
 |
| The decisive break through the Roman center. |
 |
The hole in the center is visible, allowing the Carthaginians
to surround the Romans. |
 |
| The new Libyan infantry served well. |
 |
| The enemy is trapped. |
 |
| Finishing the job... |
 |
| Hannibal is pleased as he watches the victory. |
 |
| Romans stand against the war elephant. |


Looks like a great game! Though Im with old Cato:
ReplyDelete'Et ceterum censeo carthaginem esse delendam'
So I'll wish the Romans a bit more luck for the next time.
Bah! We will never be destroyed! Not in this reality anyway ;)
DeleteCarthage wins, Carthage wins! Nicely done. In the center, did you get an advantage going in 2 units deep? It looks like it was a good call.
ReplyDeleteAnd hats off to both of you for all the work it took to put on such a good game. Great looking game.
Hi Monty - yes, those two units had enough push to destroy the single Roman unit at the center and then once through the line were able to split and encircle the enemy. I'm not sure I could have done that with one unit.
DeleteHaving some units in support and reserve is a great benefit in the game and we are getting enough units on the table now that we can take advantage of it.
Nice pictures Jonathan. It was a great game but very frustrating to have so many failed command rolls.
ReplyDeleteThanks Aaron. I had a very enjoyable afternoon. Thanks again for hosting.
DeleteNice too see the new recruits (Orange scutes, etc) in action ;)
ReplyDeleteFMB
Great looking game and great report! Those initial blunders on the right flank must have been distressing :). Don't know if it would help but I believe th army commander gets a single reroll each turn. It's a rule we overlooked for many games.
ReplyDeleteThanks John - those blunders and failed command rolls did get frustrating. We have overlooked the free re-roll for the army general before as well ,but did take advantage of it during this game a couple of times. One thing that helps (and we are still forgetting these sometimes) is to take advantage of initiative moves rather than relying on command roles for those units near enemies.
DeleteThanks for stopping by Nathan - I have thought of that and I appreciate the comment. I figured most people view the images as a slideshow anyway which removes the context of the story. Perhaps I'll change it up next time.
ReplyDeleteA great looking game, looks like a lot of fun was had.
ReplyDeleteNice battlefield, and great looking figures!
ReplyDeletePhil.
Great read and nice photographs!
ReplyDeleteIt's nice to see how well 2 figure deep units look on the table! I was having doubts about that, but I'll probably try it out!